Are you trying to connect your domain with your hosting but stuck on DNS settings? In this guide, we’ll walk you through the simple steps to set custom DNS in Namecheap and connect your domain to your hosting via cPanel. This is a beginner-friendly tutorial based on our video demo.
This tutorial is useful for anyone using Namecheap as a domain registrar and a separate hosting provider (like Hostinger, Bluehost, or CrazyDomains).
Step-by-Step: How to Set DNS in Namecheap for Custom Hosting
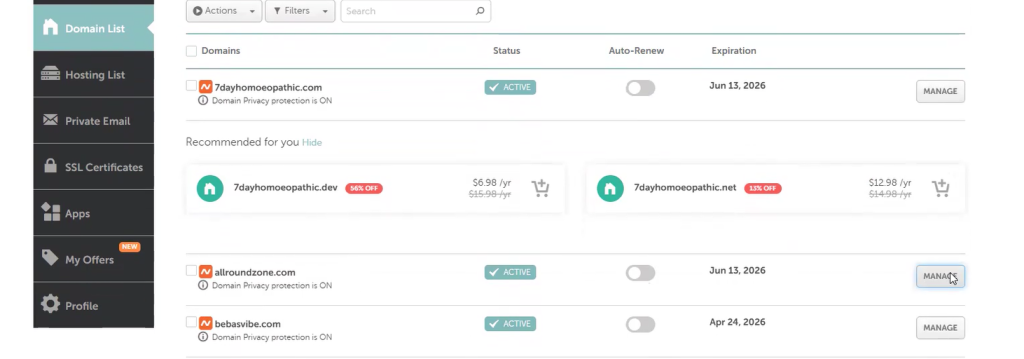
Step 1: Login to Your Namecheap Account
- Go to: https://namecheap.com
- Navigate to “Domain List” in the left sidebar.
- Find your domain and click on “Manage.”
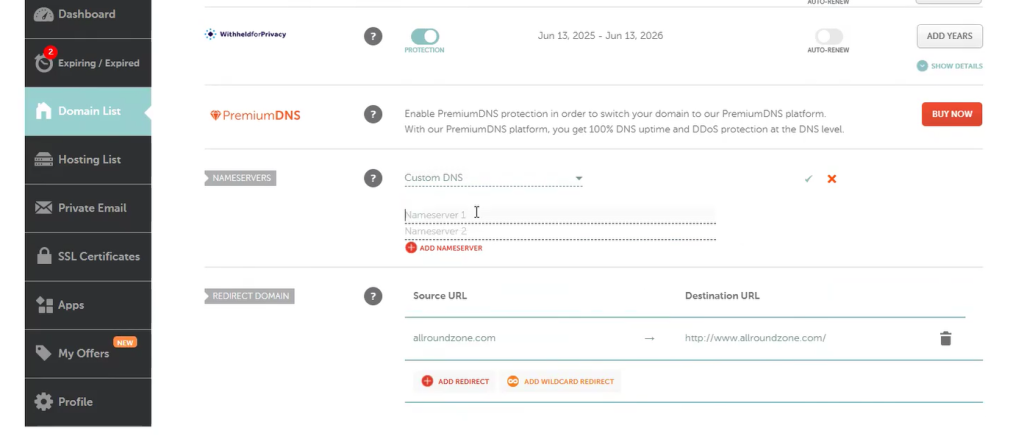
Step 2: Locate the Nameserver Settings
- Scroll down to the “Nameservers” section.
- By default, you’ll see: Namecheap BasicDNS.
Step 3: Select “Custom DNS”
- Since you’re using hosting from another company, click on the dropdown and select “Custom DNS.”
- You will now see input fields for Nameserver 1 and Nameserver 2.
Step 4: Add Hosting Provider’s DNS
- Example:
cp1.hostingprovider.comcp2.hostingprovider.com
- Replace these with your actual hosting provider’s nameservers (you’ll find them in your cPanel welcome email).
Step 5: Save and Wait for Propagation
- Click “✓ Save” or “Update”
- Changes can take 24–48 hours to fully propagate worldwide.
- Sometimes it’s faster (~2–3 hours), but in rare cases, it may take up to 72 hours.
Be patient, this is a normal part of DNS propagation.
Important Tips:
- Make sure you copy your DNS records exactly as given by your hosting provider.
- During propagation, your website might not be reachable temporarily. Don’t panic this is expected.
- If DNS still doesn’t resolve after 72 hours, double-check nameservers or contact hosting support.
FAQs
Q: Can I use the same method for GoDaddy or other registrars?
A: Yes! The DNS setup process is similar in most domain providers just navigate to the DNS or Nameserver section.
Q: Will this affect my existing emails or subdomains?
A: Yes, changing DNS affects all services linked to the domain. Configure email/MX records again if needed.
Watch the Full Video Tutoria
Final Words
Connecting your domain to hosting via custom DNS in Namecheap is easy if you follow these steps carefully. Once your DNS settings propagate, your website will go live using your new hosting.
Still stuck? Drop your question in the comments below or reach out to your hosting provider’s support.
Need help with WordPress setup too? Check out our blog on:
How to Create a Blog with WordPress Using BlogBull Theme